Quick summary
You can schedule Instagram posts from Coda by building a Zapier automation that triggers on a new Coda table row and sends the post to Buffer for publishing. This no-code workflow connects your content planning doc directly to your Instagram channel without manual copy-paste.
Steps
- Go to the left-side panel in Zapier, then click Create.
- Choose Zaps from the list of options.
- Click the Trigger tab to start the integration process.
- Search for Coda and select it from the recommended matches.
- Click Trigger Event to view the available options.
- Select New Row as the Trigger Event, or choose Updated Row if you want to trigger on a specific row change.
- Tap Sign In to connect your Coda account.
- Enter your Coda API Key and click Yes, Continue to Coda to authorize the connection.
- Specify the Document and Table that contains the Instagram post you wish to schedule.
- Click Continue to run your input and test the Trigger.
- Choose the record that contains the data you want to use, then click Continue With Selected Record.
- Search for Buffer and select it as the Action app.
- Tap Action Event to proceed further.
- Select Add to Queue from the list of Buffer action options.
- Click Sign In and log into your active Buffer account.
- Click Allow Access to grant the necessary permissions to Zapier.
- Fill in the required fields, starting with your preferred Organization and Tags.
- Select the Instagram channel you want to use for posting.
- Go to the Text field and tap its corresponding Add button to map your caption.
- Find and select the column that contains the caption you want to use.
- For Media, specify the type of attachment — images or videos.
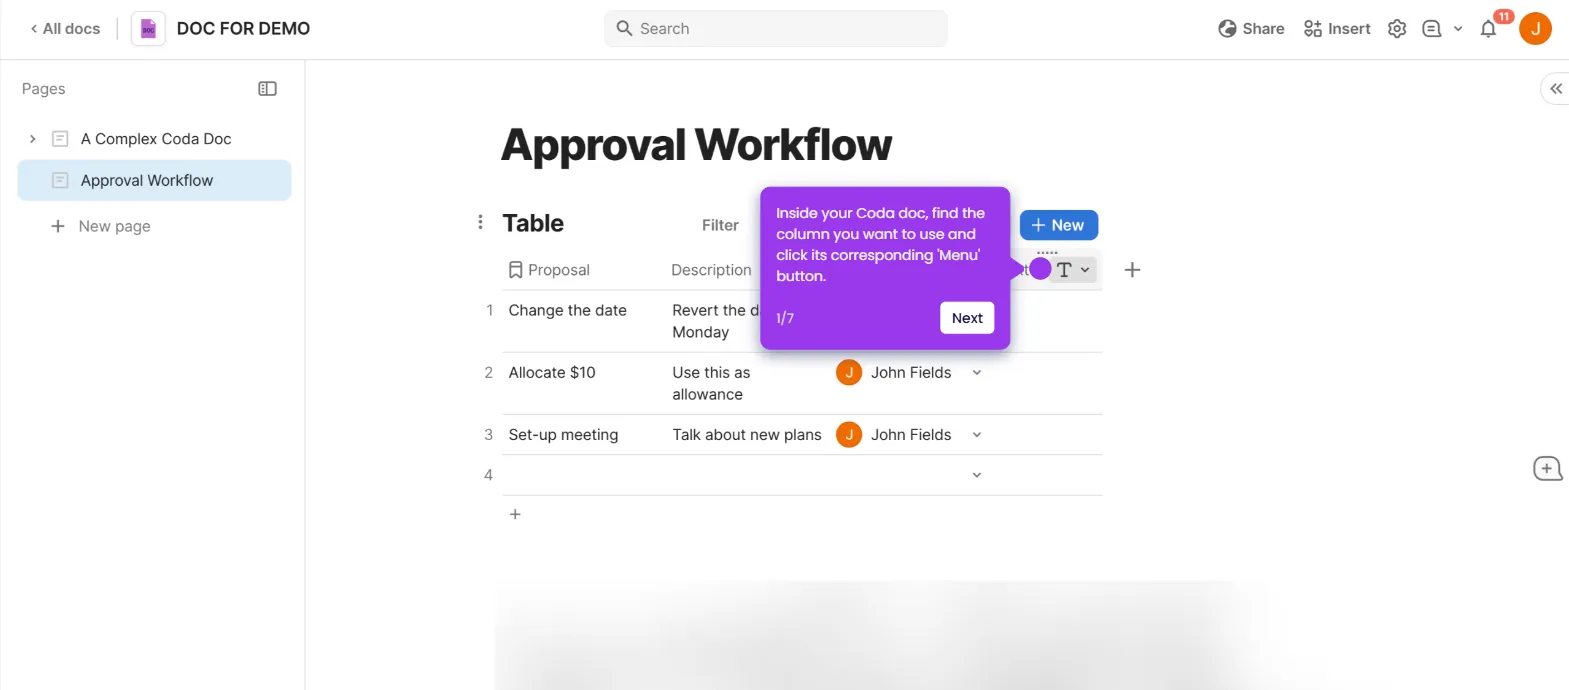
- Click the Image Menu and choose the column that contains the image file you want to use.
- Browse additional customization options such as First Comment and configure them based on your preference.
- Click Continue to publish the integration.
- Your Instagram post stored in your Coda doc is now scheduled for publication via Buffer.