This tutorial covers how to add a site to your LastPass vault and configure it so autofill works correctly, especially important when managing multiple client portals, internal tools, or shared business accounts.
Note: Getting the site URL right is critical in a business context. If the URL does not match the site you visit, LastPass will not trigger autofill, and the credential will not appear when you need it.
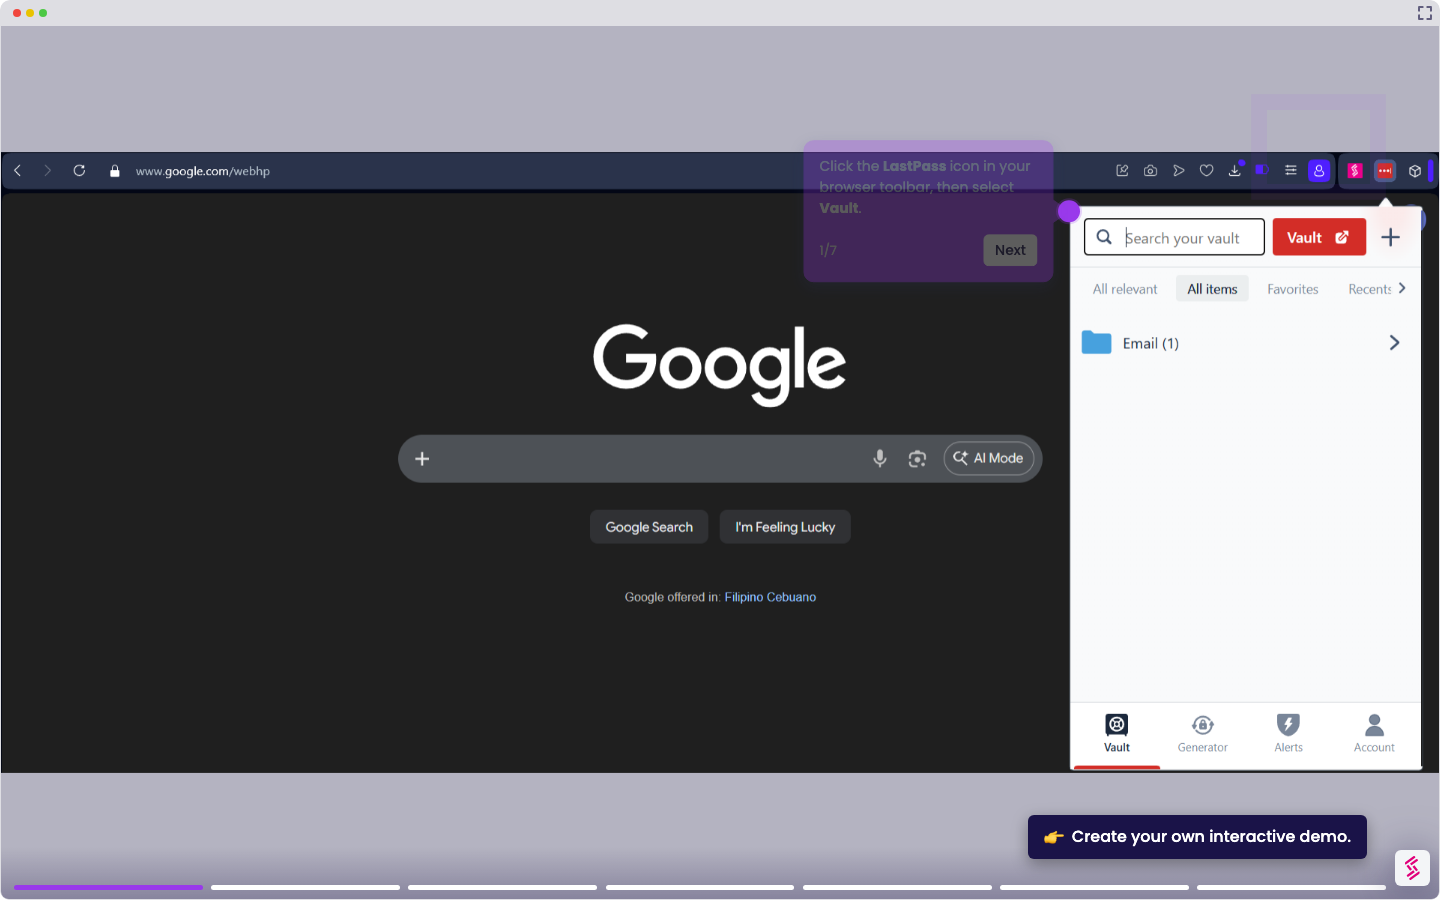
- Click the LastPass icon in your browser toolbar, then click Vault.
- Click Add Item in the bottom-right corner of the vault, then select Password from the item type list.
- Enter a name for the site in the Name field. For example, "Salesforce - Acme Corp". Use a name that identifies both the tool and the account so it is easy to find in a vault with multiple entries.
- Enter the full website address in the Site URL field, for example, "https://acme.salesforce.com". LastPass uses this URL to match the credential to the correct site and trigger autofill when you log in.
- Enter your username or email address in the Username field, then enter your password in the Password field.
- Click the Folder dropdown and assign the item to a folder, for example, "Client Accounts" or "Internal Tools". Folders keep your vault organized when managing credentials across multiple clients or departments.
- Click Save to store the site in your vault.